


Easy duties like creating, deleting, or renaming folders or information are on a regular basis duties. Learn to carry out these duties on Home windows 11 or Home windows 10.
The screenshots on this information have been created from a Home windows 11 PC. There could also be slight variations when you’re performing the duties from a Home windows 10 PC.
Create Recordsdata or Folders with File Explorer
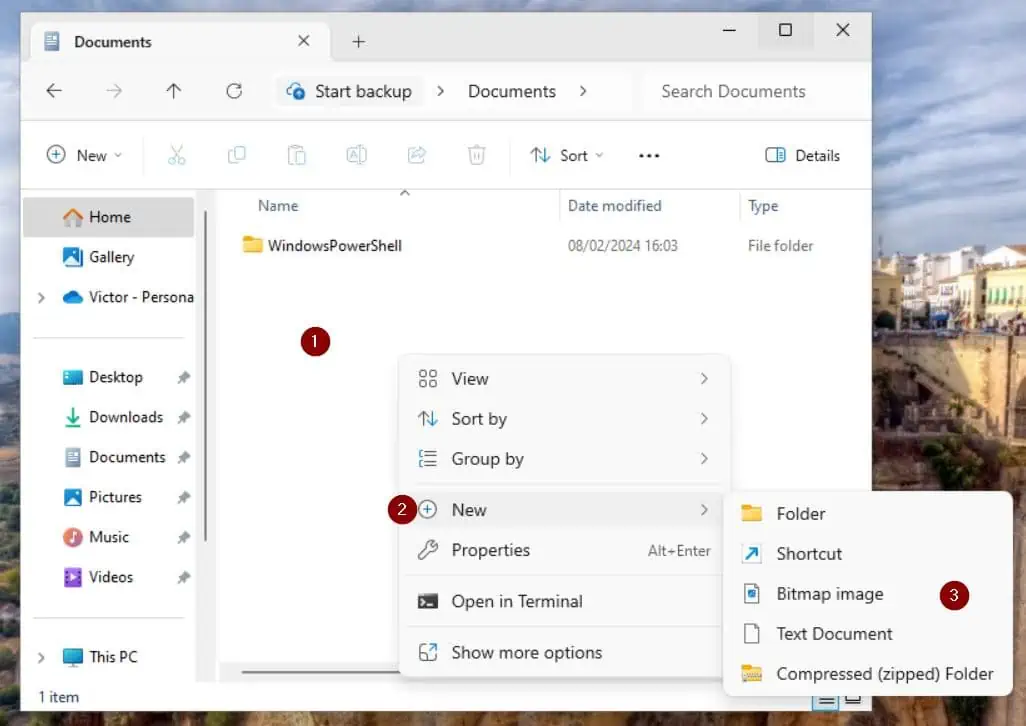
To create a file or folder in File Explorer, right-click an area the place you need the brand new merchandise, level to New, and choose the merchandise sort to create.
To create a folder, choose Folder. Alternatively, if it’s essential to create a brand new textual content file, choose “Textual content Doc.”
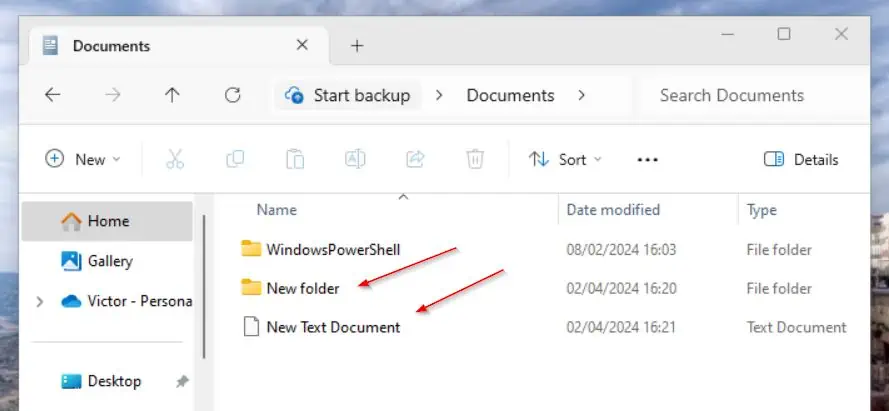
The merchandise created will take the default identify. For instance, when you create a folder, its identify might be “New Folder.”
Nevertheless, a brand new textual content file can have a default identify of “New Textual content Doc.”
Later, I’ll present you tips on how to rename the merchandise.
Past these two, you even have the choice to create Shortcuts, Compressed (zipped) folders, or Bitmap picture paperwork.
Additionally, relying on the apps put in in your PC, there might be choices to create different merchandise varieties. For instance, on my Home windows PC, I’ve Microsoft Workplace apps and Google Docs apps.
So, I’ve the choice to create new Phrase, Excel, Google Docs, and Google Sheets paperwork.
Create Recordsdata or Folders with PowerShell
Creating a brand new merchandise with PowerShell is quicker than with File Explorer. The command it’s essential to carry out this on a regular basis process known as New-Merchandise.
All it’s essential to create a brand new folder or file is to specify the trail to create the merchandise and the identify of the merchandise. Along with these two, it’s essential to additionally specify the ItemType – File or Listing.
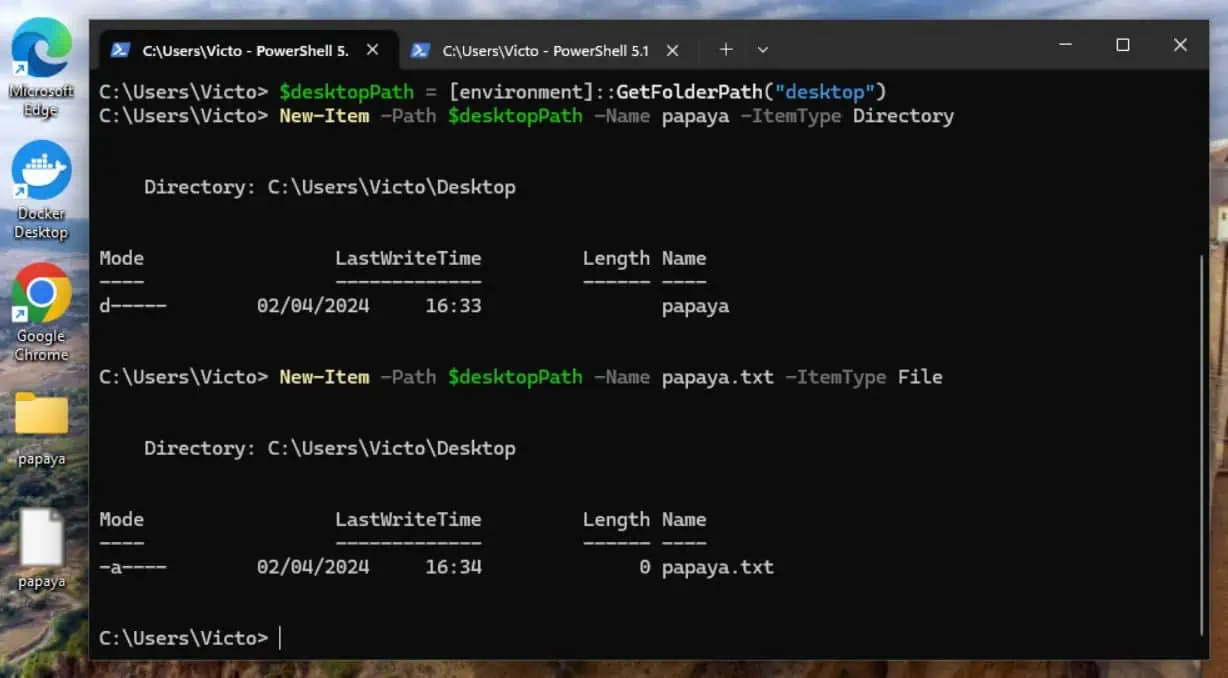
You will need to point out that while you create a file, it’s essential to embrace its extension. Here’s a pattern command that creates a folder known as “papaya” and a textual content file with the identical identify on my desktop.
$desktopPath = [environment]::GetFolderPath("desktop")
New-Merchandise -Path $desktopPath -Identify papaya -ItemType Listing
New-Merchandise -Path $desktopPath -Identify papaya.txt -ItemType File
The primary command will get the trail to my desktop and saves it in a variable known as desktopPath. Here’s a screenshot of the instructions. In the event you look intently, you will note the objects on my desktop – the underside portion of the screenshot.
Rename Recordsdata or Folders with File Explorer
Renaming a file or folder from File Explorer is as straightforward as right-clicking the merchandise and deciding on Rename. On this instance, I’ll rename the “New folder” and “New Textual content Doc” I created within the final part.
On Home windows 11, while you right-click an merchandise, it doesn’t present the “Rename” choice. Slightly, it exhibits “Present extra choices”.
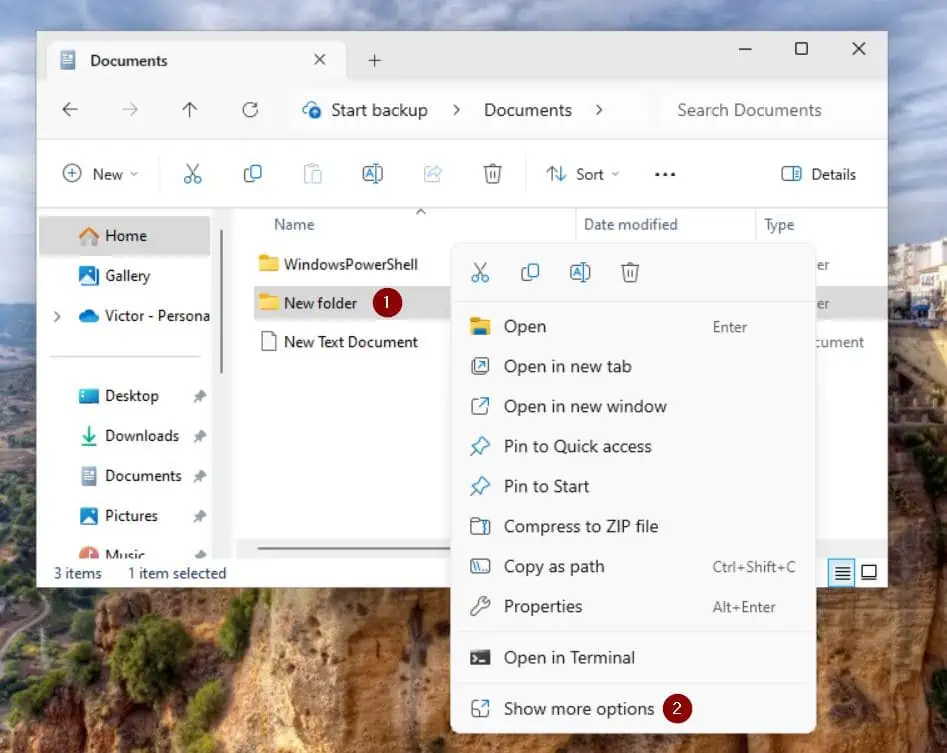
If you click on “Present extra choices” it shows the Rename choice.

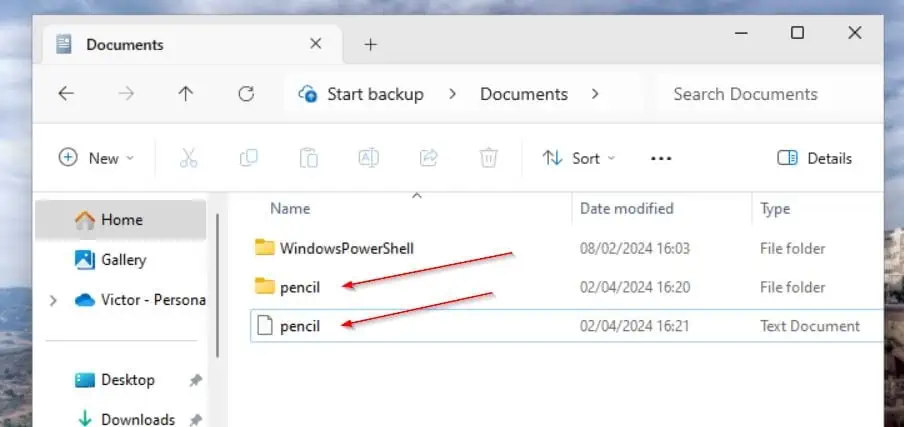
I’ve renamed the file and folder as “pencil.”
Rename Recordsdata or Folders with PowerShell
To rename an merchandise with PowerShell, you require the Rename-Merchandise command. I may present you a single command that renames the file and folder I created earlier.
Nevertheless, I might slightly break it down so it’s straightforward to know.
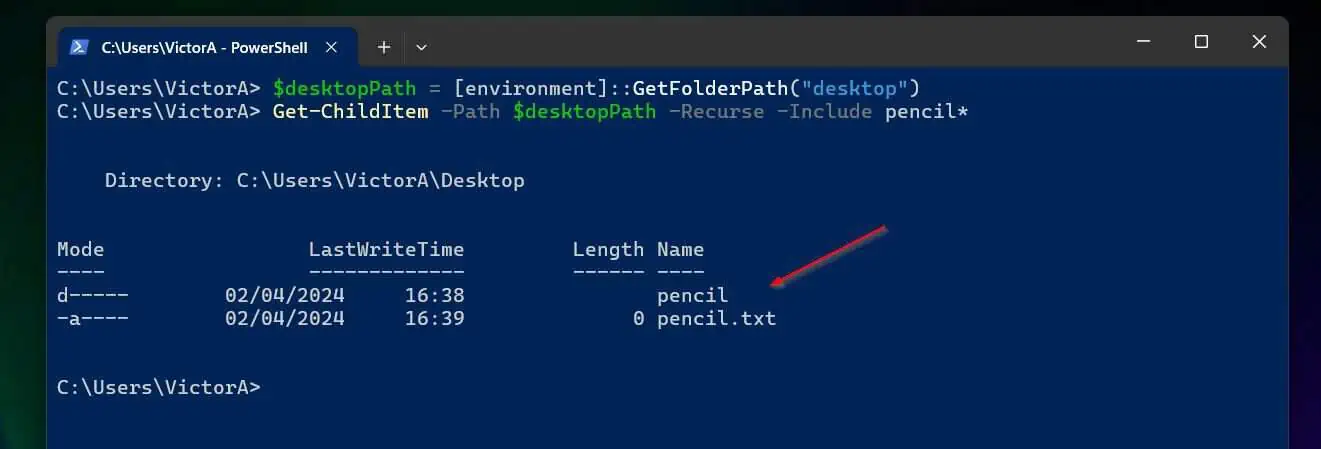
Let’s begin by returning the 2 objects on my desktop with the Get-ChildItem command.
$desktopPath = [environment]::GetFolderPath("desktop")
Get-ChildItem -Path $desktopPath -Recurse -Embody pencil*
The primary command saves the trail to my desktop to a variable. In the meantime, the second command returns the 2 file and folder I created earlier.
Within the subsequent step, I’ll pipe the final command to the Rename-Merchandise command. The identify of this command makes it apparent that it renames objects.
Nevertheless, because the Get-ChildItem command returned two objects – a file and a folder – I would like a approach to return one merchandise at a time so I can rename it.
To do that, I’ll pipe the Get-ChildItem to The place-Object earlier than pipping it to the Rename-Merchandise. I wanted the
The command beneath renames the folder and file I named “pencil” within the earlier part to “panama”.
$desktopPath = [environment]::GetFolderPath("desktop")

(Get-ChildItem -Path $desktopPath -Recurse -Embody pencil* | The place-Object {$_.PSIsContainer -eq $false}).FullName | Rename-Merchandise -NewName panama.txt

(Get-ChildItem -Path $desktopPath -Recurse -Embody pencil* | The place-Object {$_.PSIsContainer -eq $true}).FullName | Rename-Merchandise -NewName panama
The second command renames the file whereas the third renames the folder. The trick is to make use of the $_.PSIsContainer property to return the file or folder.
Moreover, because the Rename-Merchandise command requires the complete path to the merchandise, I returned the FullName (the complete path) property of the merchandise.
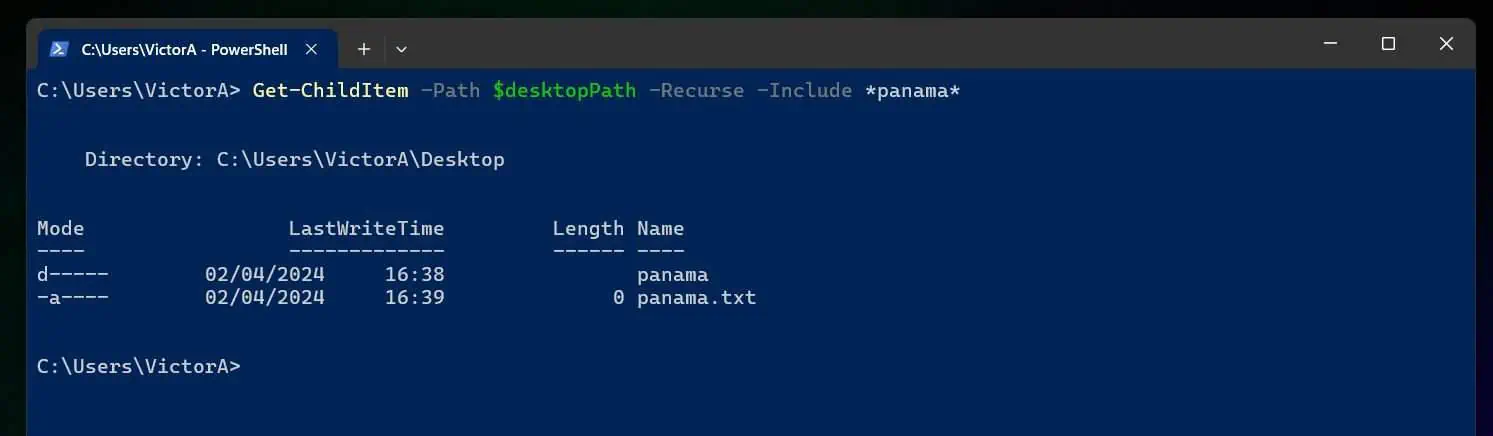
To substantiate that the objects have been renamed, see the results of the Get-ChildItem command within the screenshot beneath.
Delete Recordsdata or Folders with File Explorer
To delete a file or folder from File Explorer, right-click the merchandise and choose “Present extra choices”. After that, the Delete choice might be displayed.
Delete Recordsdata or Folders with PowerShell
Deleting objects with PowerShell is just like renaming them. Within the rename merchandise part, I piped Get-ChildItem to The place-Object after which to Rename-Merchandise.
To delete the merchandise, as an alternative of utilizing Rename-Merchandise, I’ll use Take away-Merchandise.
$desktopPath = [environment]::GetFolderPath("desktop")

(Get-ChildItem -Path $desktopPath -Recurse -Embody *panama* | The place-Object {$_.PSIsContainer -eq $false}).FullName | Take away-Merchandise -Pressure

(Get-ChildItem -Path $desktopPath -Recurse -Embody *panama* | The place-Object {$_.PSIsContainer -eq $true}).FullName | Take away-Merchandise -Pressure
Conclusion
Creating, renaming, and deleting information and folders are widespread duties. Whether or not you favor performing this process by way of GUI or PowerShell, I hope you discovered my information useful.
Kindly let me know by responding to the “Was this web page useful?” query beneath. Earlier than you go, why not try our different Home windows 11 how-to guides?


+ There are no comments
Add yours