Anyone using a Mac in the workplace knows it’s a productivity powerhouse. Not only do Macs run business staples like Microsoft Office and Google’s suite of online software but, thanks to Apple Silicon chips, modern Macs are absolute workhorses capable of driving advanced design, media creation, and scientific apps with ease.
But a Mac is more than just the apps it runs when it comes to productivity. The operating system that powers the Mac, macOS, is packed with little productivity features throughout. Some of my favorites, which users often overlook, are found in the Mac menu bar—that srtip that runs along the top of the screen and lets you access both individual app commands (such as File>Save) and shortcuts to system-wide tools.
Here are the three menu bar shortcuts I find most invaluable during the workday.
Passwords on the menu bar

In September, with the release of macOS Sequoia and iOS 18, Apple introduced the new Passwords app. Passwords is a password manager that allows you to organize and sync your passwords across Mac, iPhone, iPad, and PC. And if you use multifactor authentication (MFA) for your online accounts, Passwords is where you can find the six-digit codes you need to enter whenever you log into an account.
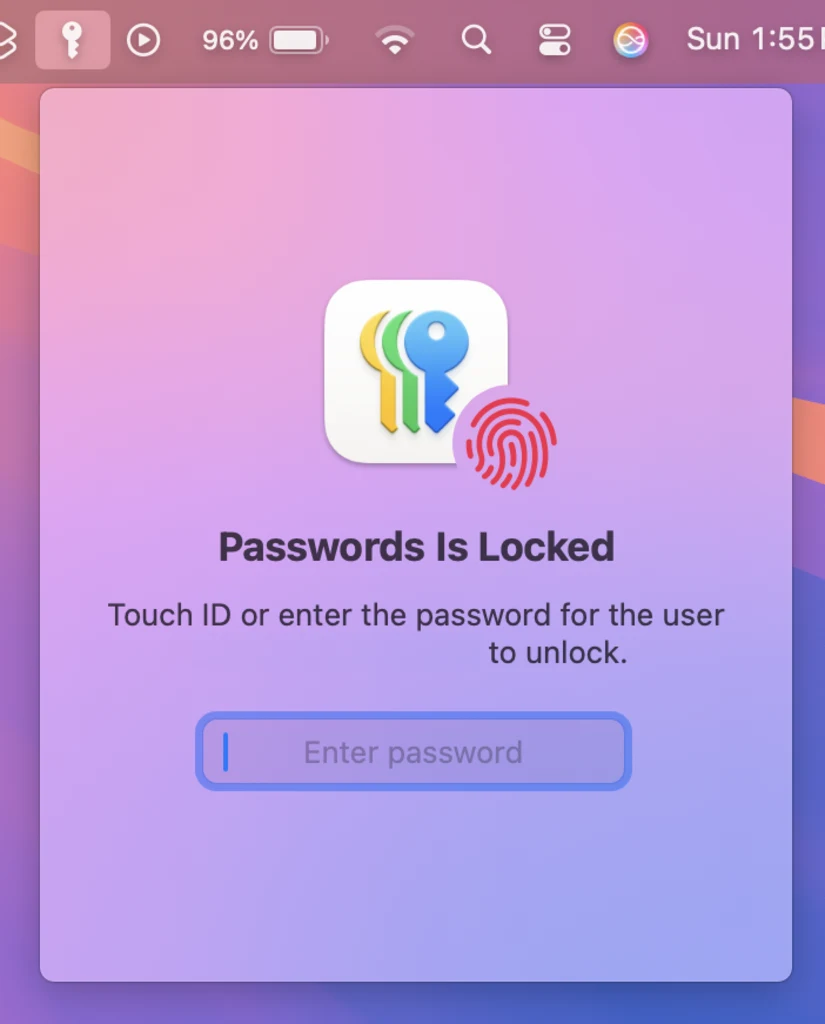
Passwords is nearly identical on the Mac and iPhone, but, the macOS version of the app has a hidden feature that the iOS version does not: a Passwords menu bar shortcut. Click on the key icon in the menu bar, and verify with your fingerprint or password in the small drop-down menu that appears. You’ll then have access to a quick searchable database of all your passwords and verification codes, no matter which app you are currently working in.
Clicking on any password entry in the menu will display all its details, including the username, password, and verification codes associated with the account. You can copy any of those items to your clipboard for pasting into other fields. I use the Passwords menu bar shortcut to quickly copy and paste my VPN’s MFA code when the app requests it.
Apple hides the Passwords menu bar shortcut by default. You can turn it on by opening the Passwords app, selecting Passwords>Settings from the menu bar, and checking the “Show Passwords in Menu Bar” box in the settings window.
Focus

Focus is the name of a feature on Macs, iPhones, iPads, and Apple Watch that lets you quickly silence distractions or receive notifications from only those you want to hear from. It is a great way to use your iPhone as both a dedicated work phone and personal phone. On the Mac, Focus mode lacks some advanced iPhone features, such as customizable home screen layouts based on the Focus you select. However, it is still beneficial for silencing notifications from specific apps and people while you are working.
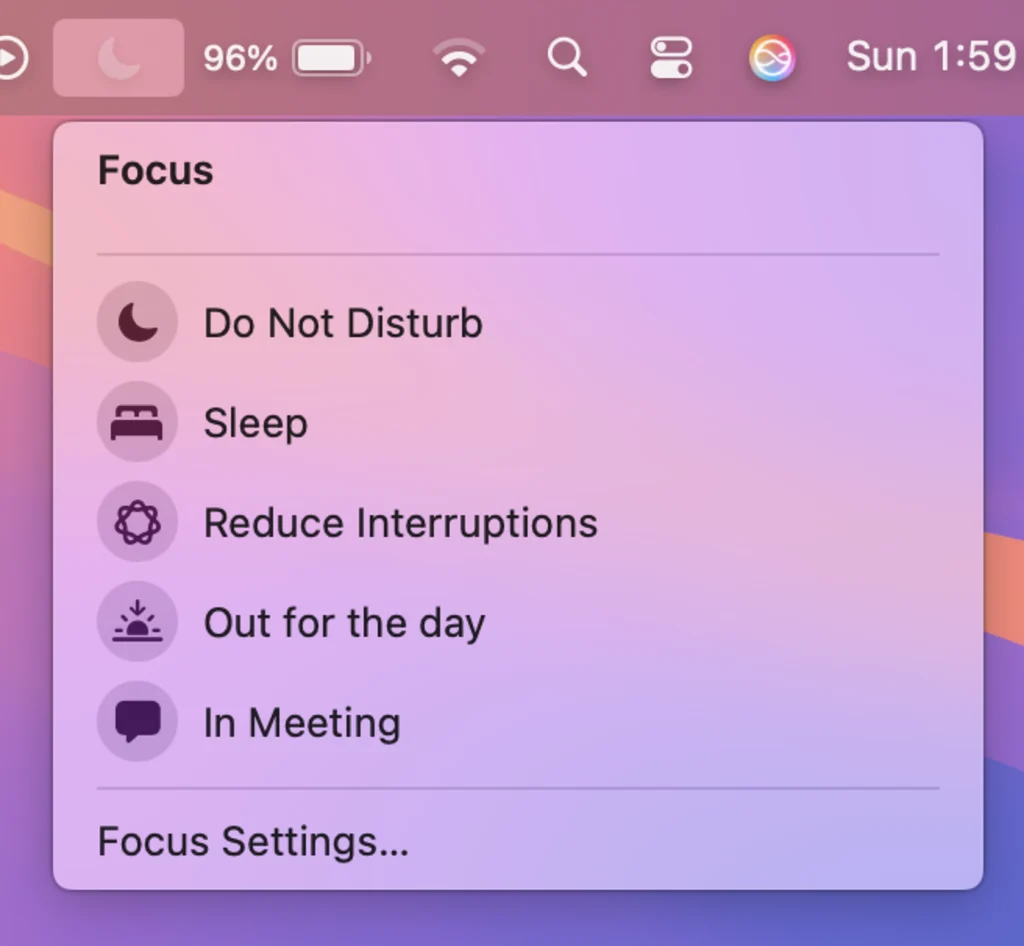
But activating Focus mode is hidden in a Control Center menu by default on the Mac. But you can put the Focus control in the Mac’s menu bar so it is front and center and just a click away when you want to enter or switch into a Focus. From the menu bar, click the crescent moon icon and then select any Focus you want. My new favorite focus is called “Reduce Interruptions.” It uses Apple Intelligence’s AI to determine which notifications should be allowed to interrupt you while silencing the ones it deems unimportant.
By default, the Focus menu bar shortcut is hidden from the menu bar when not in use. But you can force it to always show in the menu bar so you can easily activate a Focus mode. To get the Focus shortcut to appear in the menu bar, open the System Settings app on your Mac, click Control Center, and by the Focus icon, select “Always Show in Menu Bar” from the drop-down menu.
Apple Intelligence-powered Siri with ChatGPT access

Siri has long been a Mac staple, but thanks to Apple Intelligence, it’s received a massive upgrade. Siri is now smarter than ever, and you can interact with it via text instead of speaking, making it much less awkward to use in the workplace. In macOS 15.2, out now, Siri also gains ChatGPT support.
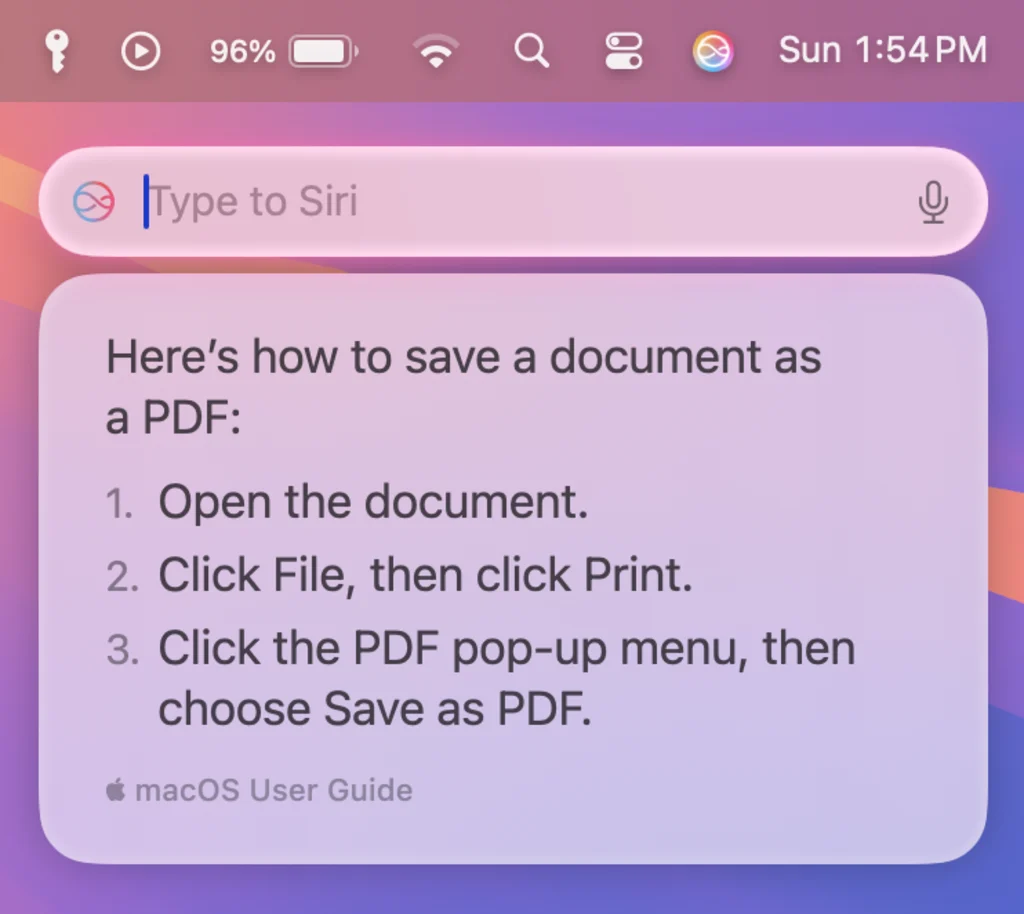
This means that Siri is now an incredibly useful productivity tool—and one you can access directly from the Mac’s menu bar. Simply click on the Apple Intelligence Siri logo in the menu bar to activate Siri. By default, Siri will wait for your spoken query. But if you click the “Talk to Siri” field that appears below the menu bar, it will change to a “Type to Siri” text entry field. You can then silently type your query to Siri.
One of the best new Apple Intelligence-powered Siri features in macOS 15 is that Siri now contains robust knowledge about Apple’s own products and software. So, if your boss asks you to send him that Word document as a PDF and you don’t know how to convert the file format, you can just ask Siri, “How do I save a document as a PDF?” and Siri will give you step by step instructions right below the menu bar.
To make sure the Siri shortcut is showing in your menu bar, open the System Settings app on your Mac, click Control Center, and by the Siri icon, select “Show in Menu Bar” from the drop-down menu.


